You are not logged in.
- Topics: Active | Unanswered
#1 2016-06-04 07:35:05
- backXslash
- Member
- Registered: 2016-03-25
- Posts: 151
Build Log / Showcase / Quasi-Tutorial : New Build Platform
I completely rebuilt my printer with new parts, didn't change the design much, but did upgrade almost everything. The set up is now a Vivitek DH559 projector with modifications done to the spacing of the lenses, an Arduino Nano running GRBL, an EasyStepper 4.4, and a linear actuator axis thing I got off eBay. (The linear stage is actually pretty awesome, I think it was made for laboratory bio-tech stuff, so it's hella accurate.)
Anyway, figured I'd post some pictures of my best print to date, as well as the process for making my new print platform. It's worth noting that the print in these pictures is actually for a job, and will be used to cast a production quality piece for my customer.
I started with a piece of aluminum sheet, and scribed lines for where to cut and drill. I decided to go with a perforated platform to aid in resin settling and even coating.

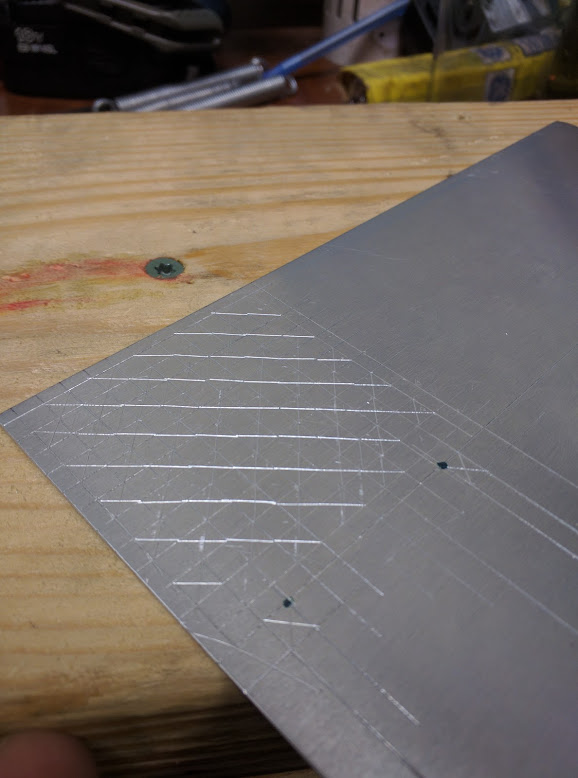
I used a green Sharpie to add a bit of color, first on the OUTSIDE of the lines denoting cuts, and then directly on top of points to be drilled. This allowed me to line up the tip of the drill bit with the center of the marks and ensure accurate drilling before committing to a given placement.

I then used a drill press and jeweler's optics to precisely drill the perforations

Using a jeweler's saw, I rough cut the new build plate out of the sheet, following the lines I'd left. Then I used a file and calipers to true the edges. Here is the platform installed on the new downposts.

The downposts are threaded rod. They're held in place at both ends with sets of washers and nuts, this allows the platform to be leveled or canted or angled depending on user preference or wear and tear.
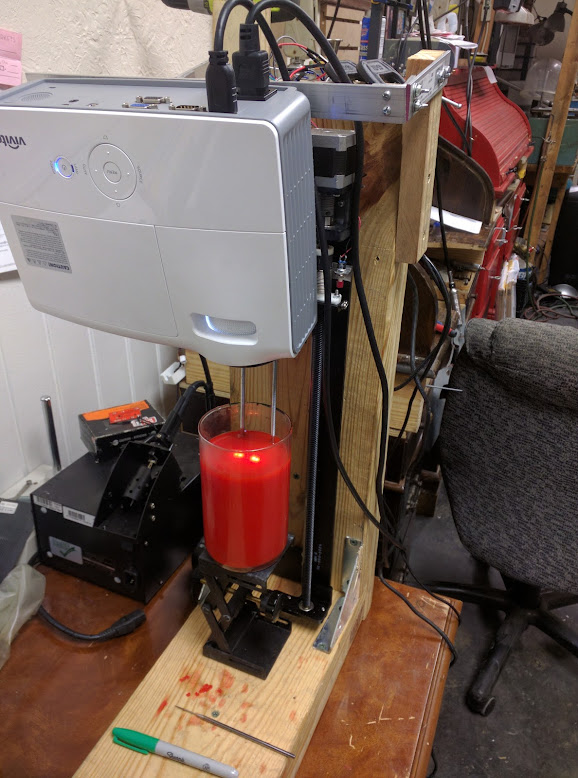
Here's a shot of the Vivitek and the top of the linear axis. You can see the placement of the platform as well as the big red endstop.

Here's a shot mid print cycle. The platform has just dipped to re-coat between layers.

Just to highlight the "built in a cave, with a pile of scraps" a la Tony Stark aspect of this thing, here's the completely exposed electronics package at the top of the printer. The object above the stepper is the Arduino on its perfboard housing. You can see the EasyStepper to the right of that. I split the board attaching the projector, and I wasn't about to rebuild the "chassis", so C-clamps were employed.

Here's a shot mid print, during an exposure. Aoyue soldering / reflow station to the left, 2 custom built jeweler's benches in the background. You can just barely see my vacuum investment table in the top right corner.
Here's another mid exposure shot. You can see the stepper and 100% precarious endstop wiring a bit better. Look carefully and you can pick out the capacitor on the endstop lines.

The job for my customer is a delicate French V-split set band that shadows her existing one. She requested a pair of them, to match her ring. You can see how well the print came out here, the fit is perfect. I'll cast the piece in 14kt white gold and set it with diamonds.

Here's the underside of the fit, the gap visible to the bottom left is caused by my inability to hold it steady and take a picture at the same time

The printer upgrades were a rush job, hence their slapdash appearance at the moment. I'll clean up the wiring in the coming few days, and add a shutter and serial adapter to talk to the projector. NanoDLP has functioned like a CHAMP, once I got it actually running. Been a fun journey so far though, and I welcome questions, comments, and suggestions.
Last edited by backXslash (2016-06-04 15:01:05)
Offline
#2 2016-06-04 13:44:00
- Shahin
- Administrator
- Registered: 2016-02-17
- Posts: 3,556
Re: Build Log / Showcase / Quasi-Tutorial : New Build Platform
I think images are broken. Could you update them?
Offline
#3 2016-06-04 15:01:32
- backXslash
- Member
- Registered: 2016-03-25
- Posts: 151
Re: Build Log / Showcase / Quasi-Tutorial : New Build Platform
I think images are broken. Could you update them?
Should be fixed - let me know.
Offline
#4 2016-06-04 15:22:10
- Shahin
- Administrator
- Registered: 2016-02-17
- Posts: 3,556
Re: Build Log / Showcase / Quasi-Tutorial : New Build Platform
Yes fixed, thanks.
Offline
#5 2016-06-04 18:53:21
- mandreas
- Member
- Registered: 2016-03-13
- Posts: 136
Re: Build Log / Showcase / Quasi-Tutorial : New Build Platform
@backXslash
very interesting solution which you adopted to raise or lower position the resin pot
cheers
Offline
#6 2016-06-23 12:09:36
- color
- Member
- From: Bulgaria
- Registered: 2016-03-19
- Posts: 84
Re: Build Log / Showcase / Quasi-Tutorial : New Build Platform
Hi,
Very nice setup and print. What resin you use? I am curious is it possible to use B9 castable resins with top down systems?
Offline
#7 2016-06-23 20:05:13
- backXslash
- Member
- Registered: 2016-03-25
- Posts: 151
Re: Build Log / Showcase / Quasi-Tutorial : New Build Platform
Hi,
Very nice setup and print. What resin you use? I am curious is it possible to use B9 castable resins with top down systems?
Thank you! Honestly, there's really only one way to find out. I've always been an advocate of "well shit, try it", right?
Offline
#8 2016-06-24 05:15:20
- color
- Member
- From: Bulgaria
- Registered: 2016-03-19
- Posts: 84
Re: Build Log / Showcase / Quasi-Tutorial : New Build Platform
If my printer was top down I would try with Emerald green. May be I would convert my CNC milling machine to top down system, not so hard to do it ![]()
Offline
#9 2017-02-18 23:01:10
- archy587
- Member
- Registered: 2017-02-18
- Posts: 11
Re: Build Log / Showcase / Quasi-Tutorial : New Build Platform
Hey very nice looking results! congrats.
I am building a very similar printer, looks like you are using the sparkfun easy driver...is that right? Do you use endstops?
thanks!
Offline