Introduction
Here you’ll learn about the NanoDLP controller board, what things you need to use it, and how to set it up.
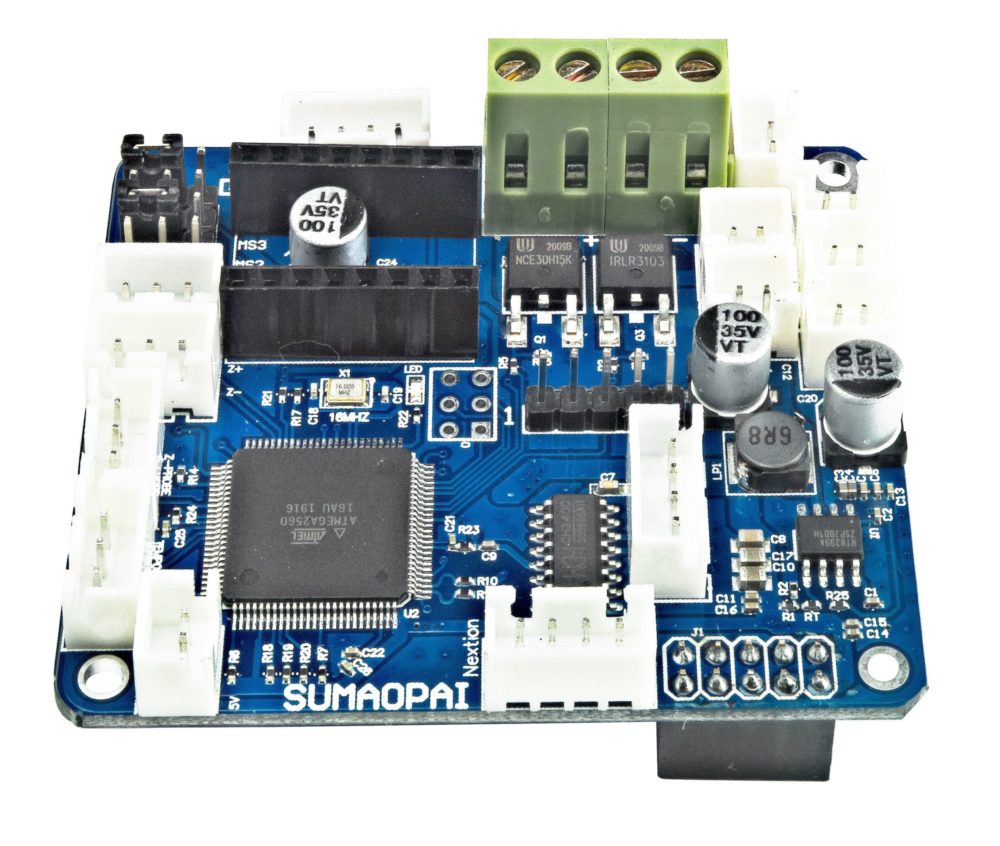
NanoDLP controller board is a 3D printer electronic kit, which makes it easy to upgrade your existing 3D printer with NanoDLP or make your own 3D printer.
The controller board is more reliable and an advanced alternative to NanoDLP shield.

What is included
Standard version of the NanoDLP controller board comes with following hardware:
| Part | Quantity |
|---|---|
| NanoDLP Controller Board | 1 |
| Trinamic TMC2209 | 1 |
| NanoDLP Preloaded on a High Speed 8GB SD Card | 1 |
| TFT 3.5″ HMI Touch Screen (Optional) | 1 |
| Controller USB Connector | 1 |

What you will need
Which Raspberry Pi
Even-though NanoDLP runs on all Raspberry Pi versions, it is the best to get Raspberry Pi 4 B as its performance is higher than older versions.
If the 3D files you plan to print are under 100MB, 1GB Pi 4 will be enough. For larger files it is better to get Pi 2GB or even 4GB.

HDMI Cable
To connect LCD / Projector to Raspberry Pi you will need an HDMI cable. For Pi 4 you will need micro HDMI – HDMI cable.
Power Supply
Stable power supply with 12~24V 5~20A output.
3D Printer Hardware
To use NanoDLP controller board you need to wire it to the following hardwares inside your 3D printer:
- Stepper motor
- LCD Driver or Projector with HDMI connector
- Min endstop switch (NPN)
Optional Hardware
- Fan
- Min / Max Limit Switches
Setup NanoDLP Controller Board
SD Card
NanoDLP Controller Board comes with a ready to use SD card. You just need to put it into Raspberry Pi.

Raspberry Pi
You need to place the NanoDLP controller board as a Hat over top of Raspberry Pi.
Make sure pins are correctly placed. Also one of the Pi’s USB port should get connected to the board.

HMI Display
The provided touchscreen is not nextion but it provides same functionality together with NanoDLP.

Wiring Stepper Motor

Stepper Motor Driver

HDMI
The LCD driver coming with your 3D printer should be wired to Raspberry Pi directly.
Network Setup
NanoDLP supports wireless communication through WiFi, but preferred mode of communications is through Ethernet port. By connecting ethernet port Raspberry Pi to your local network you can access NanoDLP through any device in your home network.
Limit Switch
Default NanoDLP controller boards require the min switch to be wired.
LED Driver Power Supply (Optional)

FAN (Optional)
There are five fan connection ports for cooling purposes, usually UV LED based 3D printers generate lots of heat in order to guarantee longevity of the equipment you can wire fans to the designated ports.

Power Supply / Adapter
The NanoDLP controller board requires 12~24V 5~20A input depending on hardware you are using. Make sure you are using a well made adapter / power supply as it could affect stability of your printer.

Power Up Controller Board
The NanoDLP controller board doesn’t have a power switch. As soon as you connect it to the power supply, it will turn on.
Make sure
- Raspberry Pi should not get connected directly to power, NanoDLP controller board already provides power to Raspberry Pi.

You should see a red LED light up on the Raspberry Pi, which indicates that Raspberry Pi is connected to power. Also HMI display should power up after boot up gets completed in under a minute, HMI display connecting screen should change to home page.
Connect to NanoDLP
Configurations
HDMI and Network Settings
If you need to adjust HDMI settings based on manufacturer instructions you can do it by going to setup / tools / Edit Raspberry Pi Settings.

Then correct parameters based on instructions and reboot.

Axis and movement details
You need to correct configurations based on your current hardware through the NanoDLP setup page. Z-Axis height settings need to be updated.

Where to purchase?
You can buy the controller board from the online shops below:
- Buy NanoDLP Controller Board with HMI from Ali Express
- Buy NanoDLP Controller Board without HMI from Ali Express
Where to find help?
For more advanced guide check NanoDLP documentation on NanoDLP controller board.
If you’re having problems with your NanoDLP Controller Board, there are lots of places you can get help and advice:
- You can join NanoDLP forum and ask for help
- You can use NanoDLP Facebook public group
- Reach out us by sending email to contact@nanodlp.com